After few trials and errors I've finally found a way to export a fully rigged character from Blender to Unreal Engine 4 and then re-target built-in animation for use within UE4. As there are few hoops to jump through, I'm going to document the workflow step-by-step (with pictures!).
- Make sure you're running at least Blender 2.72, I had some problems with the built-in fbx exporter in earlier versions.
- Switch Blender to metric units with scale 0.01 (properties panel, scene tab).
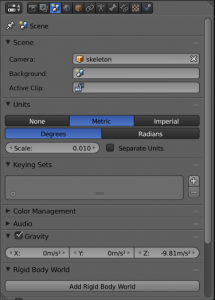
Screenshot showing Blender being configured for metric system - Adjust camera camera clipping point.
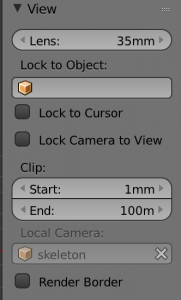
Screenshot showing setting up clipping point in Blender - Your model is probably tiny now. Scale it up by 100 times (or to a desired height in meters!), remember to scale armature together with your mesh. Make sure you're in the object mode. After it's done apply your object transformations
ctrl+a. If you have some transformations applied to your armature you might need clear the mesh first (in other words undbind the rig from the mesh), apply transformations, then re-attach your rig.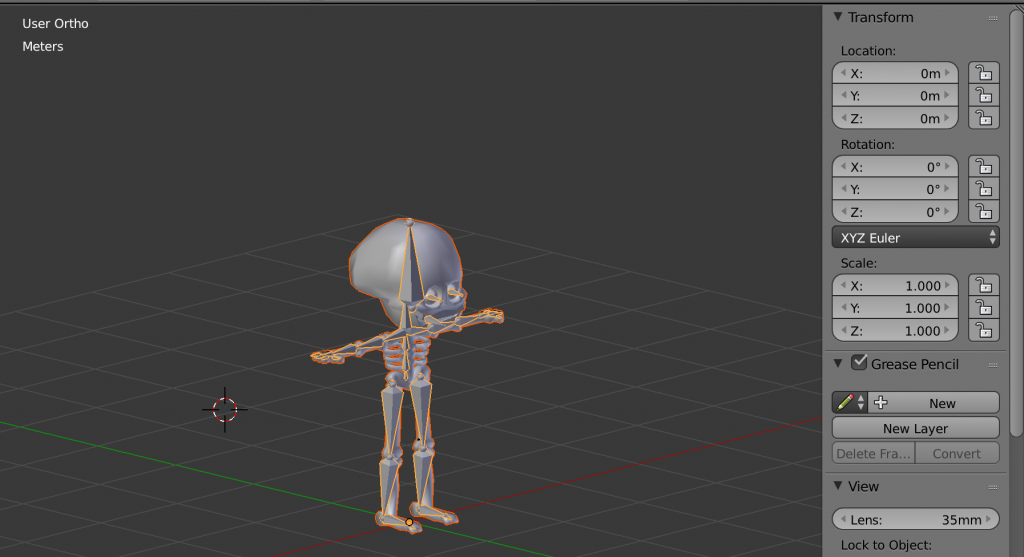
Screenshot showing Blender with transformations applied - Make sure your character is facing positive Y axis. Apply object transformations again if rotation is required.
- Select your character and your armature using
shift+click. - Select
File -> Export -> Autodesk FBX (.fbx) - Use the following settings:
- Version: FBX 7.4 binary (newer is probably ok!)
- Armature and Mesh selected for export
- Scale: 1.0
- Forward: Y Forward (actually doesn't seem to do much if -Y Forward is selected here, what's important is that your character is facing positive Y )
- Up: Z Up
- [✓] Apply Modifiers
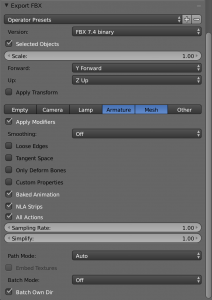
Screenshot showing export to FBX options in Blender - Next follow this tutorial for bones in your own skeleton to match bones in the built-in Humanoid skeleton. Re-target manager doesn't seem to have any save button which might be somewhat misleading - once you select matching bones you can just close it. Also do the basic mapping first then test with some simple animations - this will save you some time in case you need to re-import and redo the whole thing.
That should do it, you should be able to get your character re-use existing UE4 animations! Here's the little fella using run animation: